


A small drip can tell a big story if you know how to read it, and a little routine care keeps small problems from turning into wallet-emptying disasters. Plumbing systems respond well to steady habits: quick checks, simple fixes, and a bit of common sense go a long way.
With a mix of careful inspection and a few hands-on chores, many costly calls to the repair person never happen. Try forming a few practical routines and watch how often you dodge trouble.
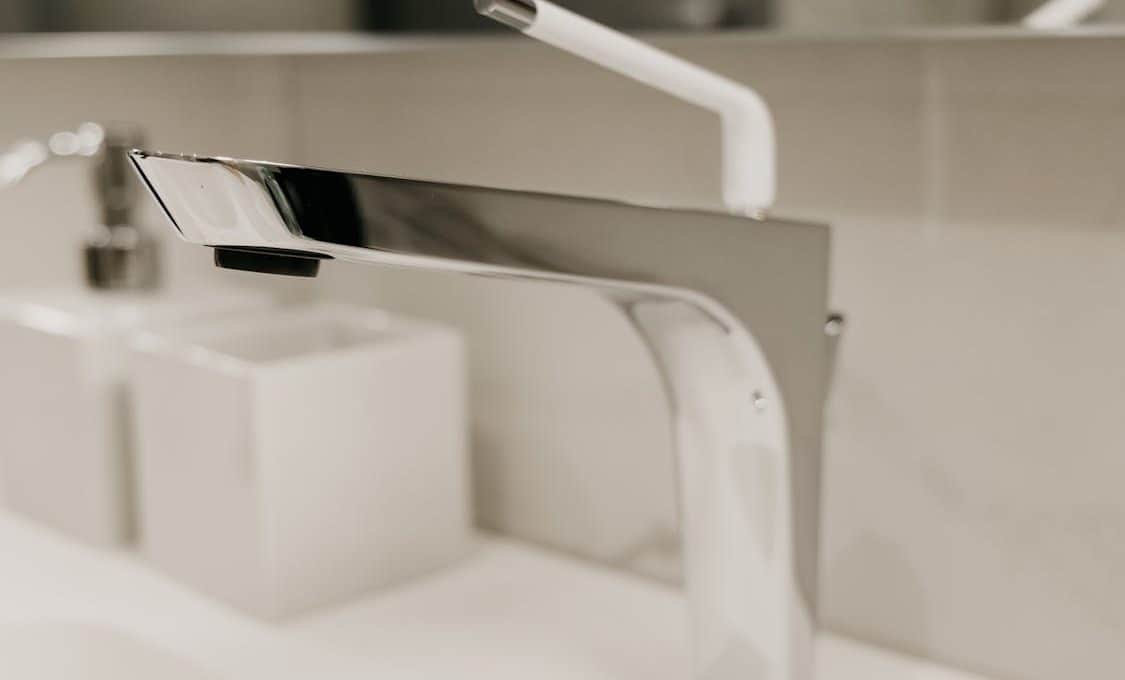
1. Inspect Fixtures And Exposed Pipes Regularly
Make a habit of scanning under sinks, around toilets, and along visible pipes for drips, stains, or corrosion on a weekly or monthly basis; catching a tiny leak early keeps the issue from growing into a rotten floor or ruined cabinet. A slow drip often leaves signs — water spots, a faint musty smell, or tiny mineral deposits — and those clues let you act fast before structural harm shows up.
Use a flashlight, run your hand along joints, and tighten small fittings with a wrench when threads feel loose; light maintenance like tightening a joint or replacing a washer will save a chunk of change. If a sudden leak catches you off guard, it’s best to contact professionals known for their fast response for plumbing issues to prevent major water damage.
Don’t forget to check around appliances that use water, such as washing machines and dishwashers, because hoses and connections age and harden, leading to sudden failures. Swap rubber hoses for braided stainless steel when you can; the upgrade is inexpensive but brings much greater resistance to bursts and abrasion.
When you see green or white buildup around a fitting, act — that mineral crust is often the opening act for a bigger leak. Keep a small repair kit handy: tape, a few washers, a crescent wrench, and a bucket will let you fast-track temporary fixes until a permanent repair is made.
2. Keep Drains Clear And Be Mindful Of What Goes Down
A clogged sink is more than a nuisance; it raises the odds of slow backups, foul odors, and pressurized fittings that ultimately fail and leak. Use a drain screen to catch hair and debris, and periodically pour a cup of baking soda followed by hot water to help break up light buildup without harsh chemicals that can hurt pipes.
When a slow drain shows up, try a plunger or a drain snake before reaching for chemical cleaners, since those corrosive liquids can eat away at seals and joints over time. Think of your drains as narrow rivers: if you let grease and solids enter, they’ll form dams that force the whole system to work harder and wear out sooner.
Avoid flushing wipes, feminine products, coffee grounds, or large food scraps down the drain, since those items are common culprits in blockages that need professional removal. For kitchen sinks, collect excess grease in a jar and toss it in the trash once cool; poured grease cools and clumps inside pipes, leading to stubborn clogs.
If your home has a garbage disposer, run cold water while grinding and feed only small amounts at a time to prevent jams. A little attention to what you send down drains prevents big cleanups later and keeps pipes flowing freely.
3. Flush Water Heater And Check Anode Rods Periodically
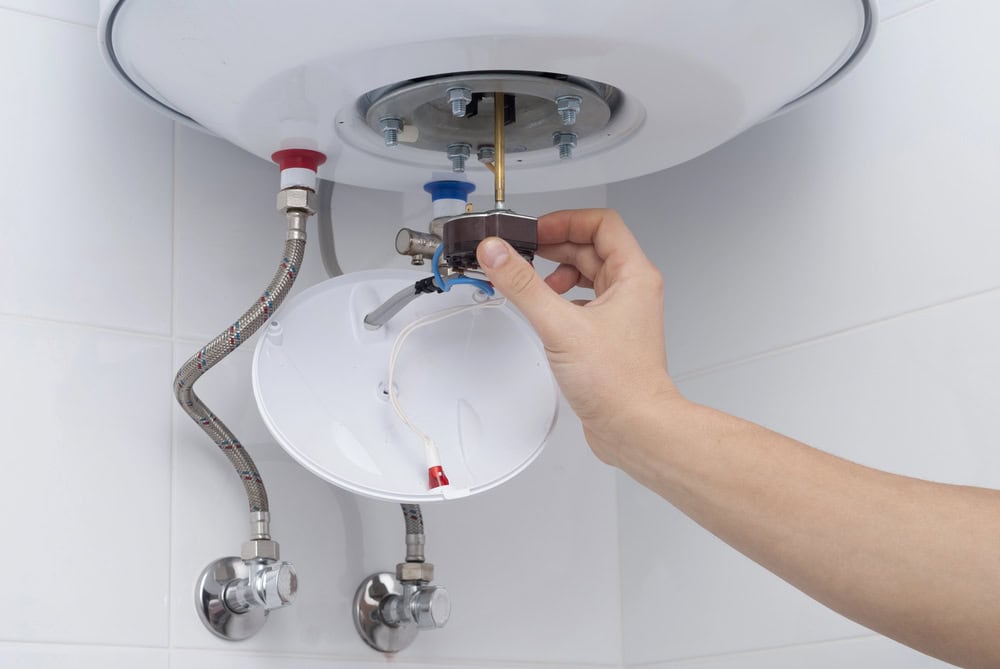
Sediment builds up at the bottom of storage-type water heaters over time, reducing efficiency and stressing the tank metal, which encourages leaks and early replacement. Draining a few gallons from the tank once or twice a year clears sediment and keeps the unit running smoothly; this simple chore lengthens the life of the heater and maintains steady hot water performance.
Inspect the anode rod every couple years; this sacrificial piece attracts corrosive elements and protects the tank’s interior, and swapping a spent rod is inexpensive compared with buying a new heater. If your hot water gets rusty or the tank sounds like a popcorn machine, take it as an early warning sign and act before the tank gives up the ghost.
When inspecting the water heater, scan pipe connections and the pressure relief valve for signs of leaks or seepage, since those areas are common failure points that lead to puddles and damage.
Test the relief valve occasionally by lifting its lever to let a small jet of water escape and confirm it seats properly when released. Keep the area around the heater clear so you can spot damp spots quickly and a technician can work without hurdles. Routine maintenance on the heater means fewer emergency calls and steadier bills over time.
4. Insulate Pipes And Protect Against Freezing
Cold spells can turn a harmless pipe into a disaster scene in a flash, and burst pipes are among the priciest repairs a homeowner faces; insulating pipes is inexpensive and often prevents that nightmare. Fit foam sleeves to exposed pipes in basements, crawl spaces, attics, and garage areas, and seal gaps where cold air sneaks in around pipe runs; insulation slows heat loss and keeps water moving at safe temperatures.
During freezing snaps, open cabinet doors under sinks and let a trickle of warm water run from faucets on exterior walls, which reduces the chance of standing water freezing inside narrow lines. Even a minimal investment in insulation and a little preventative action can save you from a flood and a major bill.
If you travel in winter, set the thermostat to a moderate temperature and ask a neighbor to check the place now and then so pipes don’t sit unheated for days on end and then crack. Know where the main shutoff valve is and practice turning it off so you can stop flow quickly if a line breaks while you’re away.
Label valves clearly and post brief instructions near critical shutoffs for anyone who might need to act in a hurry. Taking steps before freezing conditions arrive helps you dodge those catastrophic failures that are hard to live down.
5. Watch Water Pressure And Use A Pressure Regulator If Needed
Excessive water pressure puts stress on fixtures, joints, and appliance connections, shortening lifespans and increasing the chance of sudden failures, while low pressure signals flow issues that point to hidden trouble. Have the pressure tested with a simple gauge screwed onto an outdoor spigot and aim for a steady reading in the range recommended for your local plumbing system; replacing an aging pressure regulator is a modest expense that protects the whole network.
If you notice banging pipes or frequent leaks at hose bibs, valves, or appliances, high pressure could be the culprit and a regulator repair or replacement will stop that wear and tear. Treat pressure like the pulse of your plumbing system: when it’s off, something’s likely wrong upstream or downstream and it pays to trace the source.
Check for small, repeated leaks at washers and hose connections that can indicate pressure swings, and tune pressure gradually rather than making abrupt adjustments that mask deeper issues. A quiet house with steady water flow usually signals a healthy system, while surges, hammers, or sputtering points to issues that compound over time.
Install water hammer arrestors near fast-closing fixtures such as dishwashers or washing machines when you detect loud knocks, since that shock can loosen fittings and create drips later on. Little fixes aimed at pressure control keep the system calm and cut down on emergency repairs.